A Powerful Tool for Creative Image Styling
https://www.on1.com/videos/how-to-use-the-photo-filter/
The Photo Filter in ON1 Photo RAW is one of the most versatile and powerful tools available for enhancing and stylizing your photographs. In this tutorial from a video by Dylan Kotecki of ON 1, we’ll dive deep into what makes this filter so impactful, how to use its different settings, and how to incorporate it into your editing workflow for everything from subtle tones to dramatic effects.
What Is the Photo Filter?
The Photo Filter emulates the look and functionality of traditional lens filters—like polarizers or graduated filters—used by photographers to manipulate light and color directly in-camera. But in ON1 Photo RAW, you have far more control and flexibility with how and where the effect is applied in your digital image.
Getting Started: Adding the Filter
To begin, navigate to the Effects tab in ON1 Photo RAW, click “Add Filter,” and choose Photo Filter from the list. Once added, you’ll find a range of options to help tailor the effect to your image.
Choosing and Applying Colors
One of the first steps in using the Photo Filter is selecting a color. You can:
- Click on the color swatch to open the color dialog and select a specific hue.
- Adjust the Hue slider directly to fine-tune your color choice.
This color is then applied to your image depending on the Filter Type you select.
Exploring Filter Types
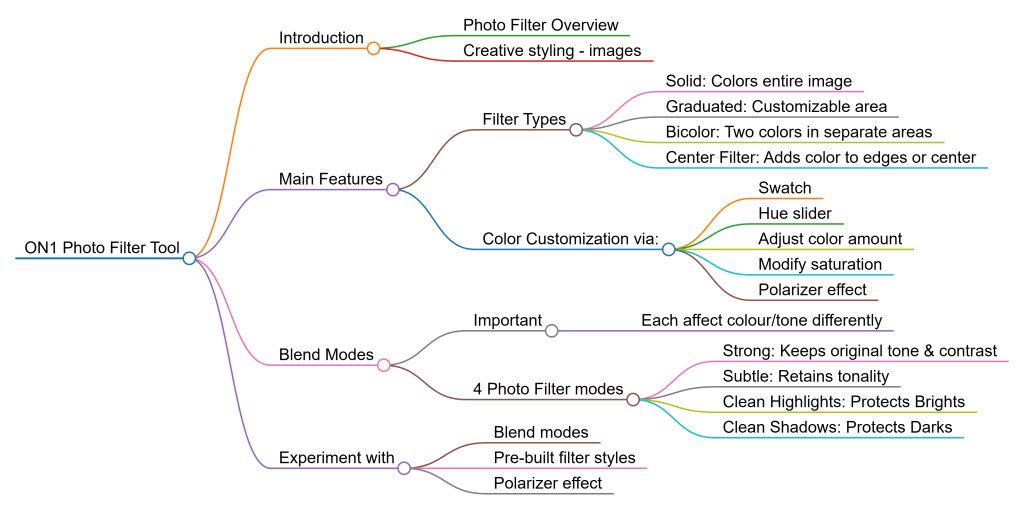
There are four filter types in ON1’s Photo Filter:
1. Solid
Applies your selected color uniformly across the entire image. Ideal for an even, stylized overlay.
2. Graduated
Targets a specific section of your image—such as the top, bottom, or sides—creating a gradient that blends the color into the rest of the photo. You can:
- Choose from presets like Right Half Fast or Bottom Third Slow.
- Adjust Distance, Rotation, and Transition to control the position and softness of the gradient.
3. Bicolor
Applies two different colors to opposite areas of the image. For instance, blue on top and orange on the bottom—ideal for landscapes with sky and foreground elements. You can adjust:
- Color placement using the position and distance sliders.
- Transition blending for smooth or stark color shifts.
4. Center
Lets you apply a color either to the center or edges of your image. Use the Size and Transition sliders to control the scope and blend of the effect.
Fine-Tuning Your Filter
Once you’ve selected the area and colors, it’s time to refine the effect using:
- Amount: Controls the strength of the color overlay. Pulling it up intensifies the effect; dialing it down softens it.
- Saturation: Boosts or reduces overall image saturation. Ideal if you want richer or more subdued colors.
- Polarizer: This powerful slider increases contrast and depth, similar to how a physical polarizer filter works. It can transform flat images into ones with more punch and visual interest.
Pro Tip: Using the Polarizer with warm colors can create moody, dramatic images. Just be mindful of contrast overload—dial it back if necessary.
Understanding Modes: How the Filter Blends
The Mode dropdown controls how the Photo Filter blends into your original image. Each mode affects highlights, shadows, and tonal blending differently:
• Strong
Applies the filter color intensely while preserving the photo’s original tones and contrast.
• Subtle
A more muted application of the color, maintaining natural tones and offering a gentler stylistic shift.
• Clean Highlights
Reduces the filter’s impact on bright areas, helping to keep highlights clean and white.
• Clean Shadows
Limits the effect on dark areas, applying the color mainly to the brighter parts of your image.
Each mode is useful depending on the look you’re going for—whether that’s full stylization or just a subtle enhancement.
Style Presets: A Great Place to Start
If you’re new to the Photo Filter or just want some inspiration, the Style section offers pre-made filter combinations. Hover your mouse over the list and use the arrow keys to browse through them.
Some favorites include:
- Skylight: Great for brightening areas within an image.
- Warm Cool / Warm Grad: Adds beautiful temperature contrast.
- Warm Polarizer: Delivers a dramatic, warm feel—perfect for sunset shots or moody edits.
Feel free to tweak the amount and polarizer settings on these styles to suit your creative vision.
Final Thoughts
The ON1 Photo Filter is an incredibly powerful and flexible tool that can simulate classic lens effects, enhance mood, and even completely transform the tone of an image. Whether you want subtle color grading or intense stylistic flair, this filter offers a robust range of controls to help you get there. Experiment with different combinations of colors, filter types, modes, and presets to see what works best for your photos.