Headline :
Great landscape edits aren’t about heavy effects—they’re about subtle, deliberate choices that amplify mood while keeping the scene believable.
Professional-looking landscape photos come from restraint, not slider gymnastics. The goal is to turn a flat RAW file into something emotional and atmospheric without losing realism. Most of the impact comes from a few well-chosen adjustments, guided by your eye rather than numbers, and applied in a clear, layered workflow. When done right, the image feels dramatic, immersive, and still unmistakably photographic.
The big ideas, simplified
1. Focus on what really matters (the 80/20 rule)
- A handful of tools drive most of the result.
- Subtle changes, stacked thoughtfully, beat complex edits every time.
- Stop before the image starts to look “worked on.”
2. Trust your eyes, not the sliders
- There are no magic values.
- Each scene has its own light, contrast, and color balance.
- Adjust until it looks right, not until a number feels correct.
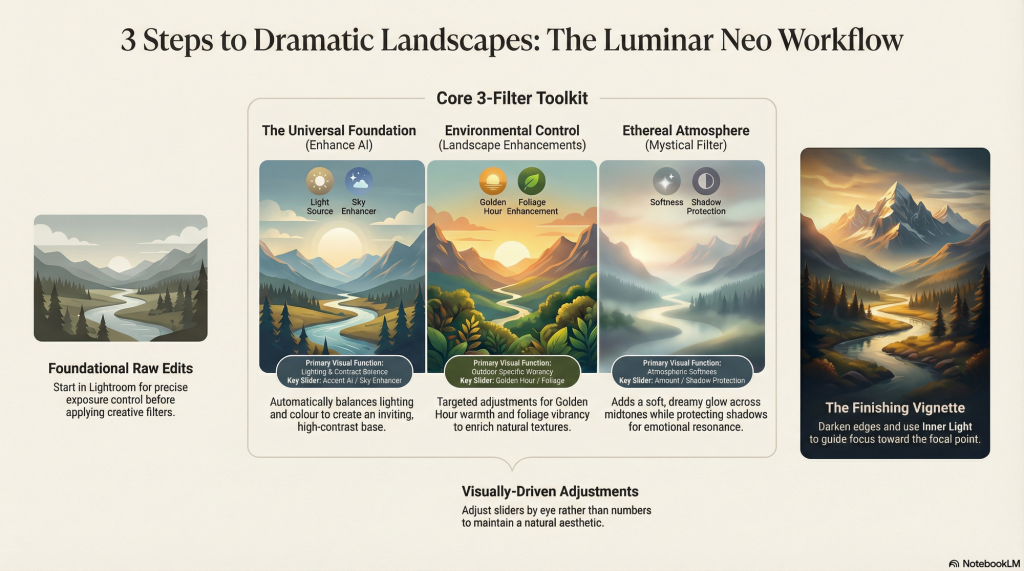
3. Work in layers, with intent
- Start clean: exposure, contrast, and color balance first.
- Then add atmosphere and mood.
- Finish by guiding the viewer’s eye.
The three biggest opportunities
| What you’re improving | Why it matters |
|---|---|
| Focal interest | Brightening key areas gives the viewer somewhere to land and adds scale to big scenes. |
| Atmosphere and depth | Soft, controlled glow in highlights and midtones adds drama and keeps viewers engaged. |
| Selective color enrichment | Warming light or boosting foliage adds emotion without overwhelming the frame. |
The three biggest risks
- Over-saturation – Push color too far and the image instantly feels fake.
- Destroyed shadows – Mood effects can flatten dark areas if you don’t protect detail.
- Loss of authenticity – Effects overpower the original, the photo becomes an illustration and loses impact.
A clean, repeatable workflow
- Balance and sky first – Open shadows gently and deepen the sky without cranking saturation.
- Landscape-specific tweaks – Add warmth and foliage carefully; skip haze if you’ve already handled it earlier.
- Atmosphere, with restraint – Introduce softness mainly to highlights and midtones. Always protect shadows.
- Final focus – Use a light vignette and subtle center brightening to keep attention where it belongs.
Bottom line
Professional landscape editing is the art of knowing when to stop.
The strongest images feel dramatic, calm, and natural all at once. That balance comes from moderation, visual judgment, and a simple workflow—not from pushing tools to their limits.