Anthony Morganti’s detailed tutorial on Luminar Neo’s masking tools offers a thorough exploration of how to selectively apply adjustments to specific parts of an image. The video covers the variety of masking options available, their functionalities, and practical tips on combining and modifying masks to achieve precise post-processing effects.
The tutorial also highlights useful keyboard shortcuts and advanced masking techniques, making it an essential guide for photographers and editors who want to master Luminar Neo’s masking capabilities and stop letting global adjustments cause degradation.
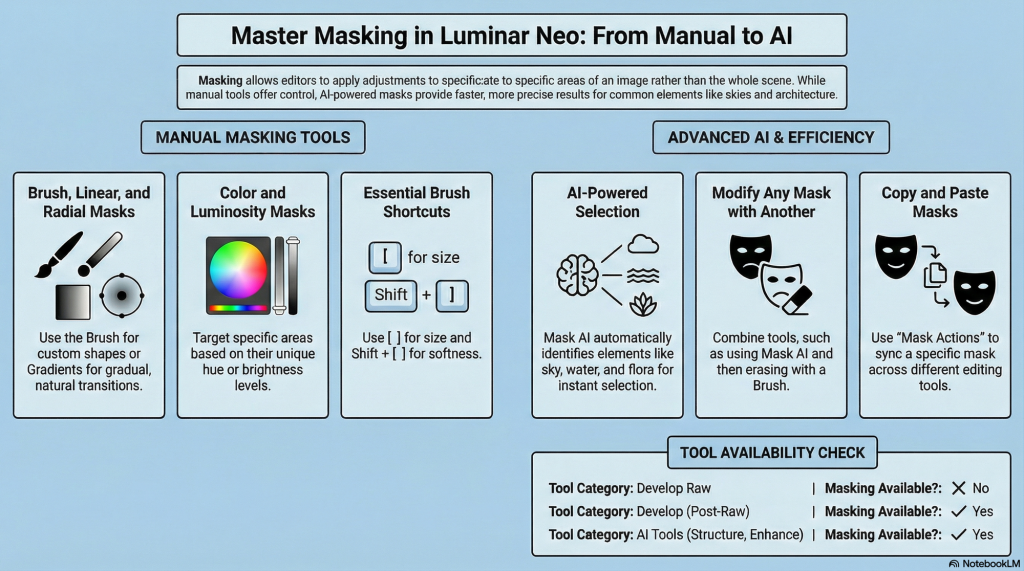
Anthony introduces the seven different types of masks available in Luminar Neo’s tools, specifically within Structure AI for demonstration purposes:
Brush Mask, Linear Gradient Mask, Radial Gradient Mask, Color Mask, Luminosity Mask, Mask AI and Object Select AI
Anthony concludes by encouraging viewers to explore the masking options in Luminar Neo, emphasizing that Mask AI and Object Select AI are generally the best starting points for most masking needs. He reiterates the availability of his free mini-course and discount code, urging viewers to take advantage of these resources for a deeper understanding and cost savings.
He explains that these masks can be combined and modified, offering flexible ways to refine selections. Luminar Neo’s masking provides the localized precision required for professional-grade output, but NB:: Not All Tools Support Masking Develop Raw lacks masking. Access standard Develop via Edits for localized refinement. This establishes your professional workflow sequence. Use Standard Develop as a second pass for tonal adjustments. Globalize in Develop Raw; Standard Develop for localized, refinements.
2. Hybrid Masking is Your Best Friend Erase specific objects from gradients with the brush tool for targeted, precision adjustments. You can modify any mask with any other mask.
3. AI Outperforms the Brush AI identifies flora or architecture, saving significant time while ensuring professional edge detection handling complex edges like leaves better than manual brushing, effectively preventing halos.
4. Syncing Masks Across Tools Use “Copy” and “Paste” actions via the Clipboard for consistency across different adjustment layers.
5. Strategic Inversion for Efficiency Inverting masks facilitates surgical precision in complex scenes by switching adjustments between subjects and backgrounds. Reflection: Inverting a subject mask treats backgrounds without affecting the primary subject’s exposure.