This video summary outlines professional Lightroom Classic techniques shared by Anthony Morganti to improve photographic post-processing workflows. Anthony describes methods for refining tonal range, such as using shortcut keys to prevent highlight clipping and shadow crushing.
It highlights a clever strategy for history panel management, allowing photographers to set specific edit milestones as baseline comparison points. Furthermore, the text details advanced masking intersections and the use of snapshots or virtual copies to experiment with diverse creative styles. Ultimately, these instructions aim to help users make more informed artistic decisions through efficient side-by-side evaluations of their work.
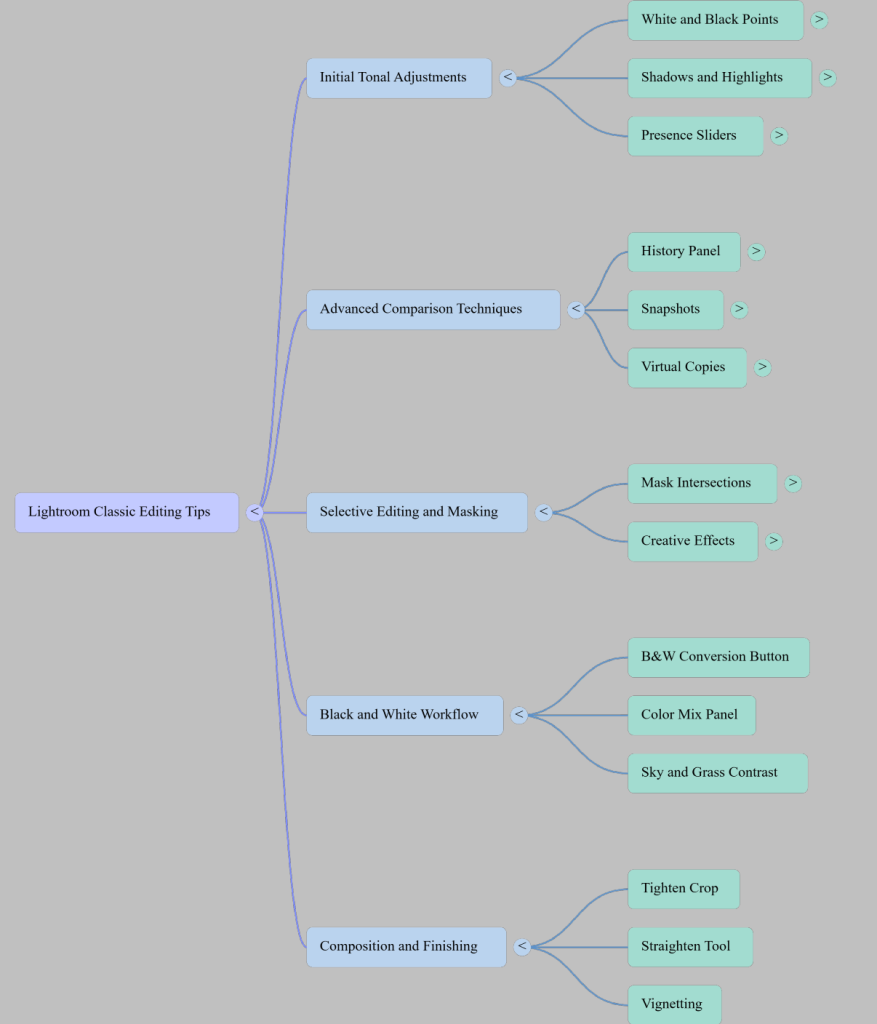
To compare different editing stages more effectively in Lightroom, you can use three main methods to move beyond the default before/after toggle, which simply compares your final edit to the fully unedited RAW file:
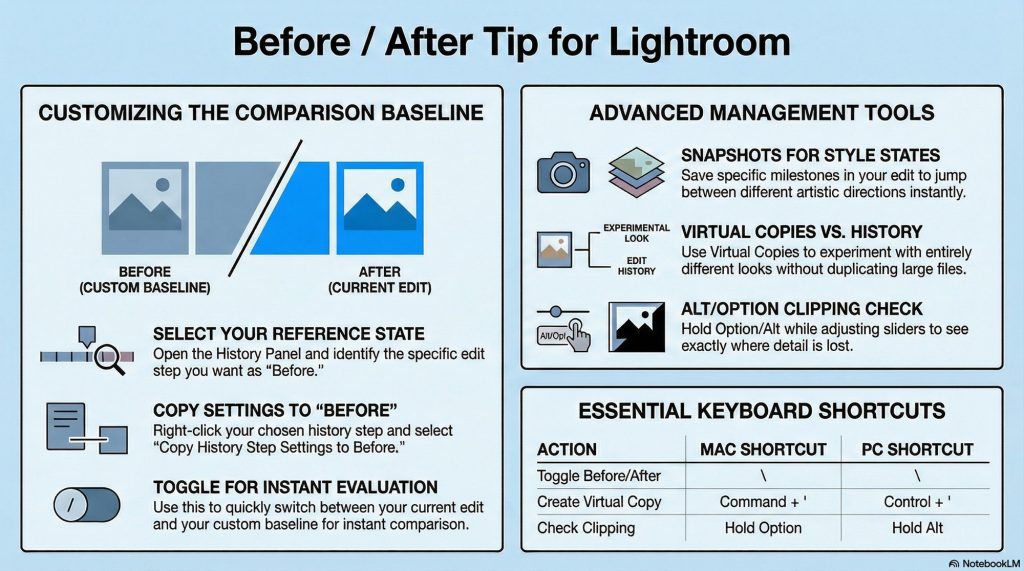
1. Customize the “Before” State in the History Panel Instead of having the “before” view jump all the way back to the unedited original, you can set a specific point in your editing process as the baseline. To do this, open the History panel on the left side of the Develop module, right-click on the specific step you want to use as your baseline (such as right after converting an image to black and white, or after applying basic color adjustments), and copy that step’s settings to the “before” state. You can then continue experimenting with advanced edits, like masks or dehaze, and use the backslash key to easily toggle between your new experimental edit and your established baseline.
2. Use Snapshots Snapshots allow you to save multiple different stages or distinct styles of edits within the exact same file. For example, you can create and name a snapshot of a “colorful” edit, apply a completely different set of experimental edits, and save that as a new snapshot. You can then simply click between your saved snapshots to compare the different looks.
3. Create Virtual Copies Virtual copies allow you to duplicate a photo within Lightroom without doubling the actual file size on your hard drive. This lets you apply entirely different editing styles to each version of the photo. You can quickly create a virtual copy using the keyboard shortcut Command + ‘ on a Mac or Control + ‘ on a PC, and then switch back and forth between the copies to evaluate which edit you prefer.