Lumatic Lab has released this update (e.o.April 26) to the ACV Converter, a browser-based tool designed to translate Adobe curve files (.ACV) into standard 3D LUTs (.CUBE) with consistent, hardware-independent results.
The application is aimed at photographers, editors and small creative teams who need a reliable way to move tonal adjustments between platforms without variation. By processing files entirely within the browser, the tool avoids reliance on GPU drivers or external services, helping ensure repeatable output across different systems.
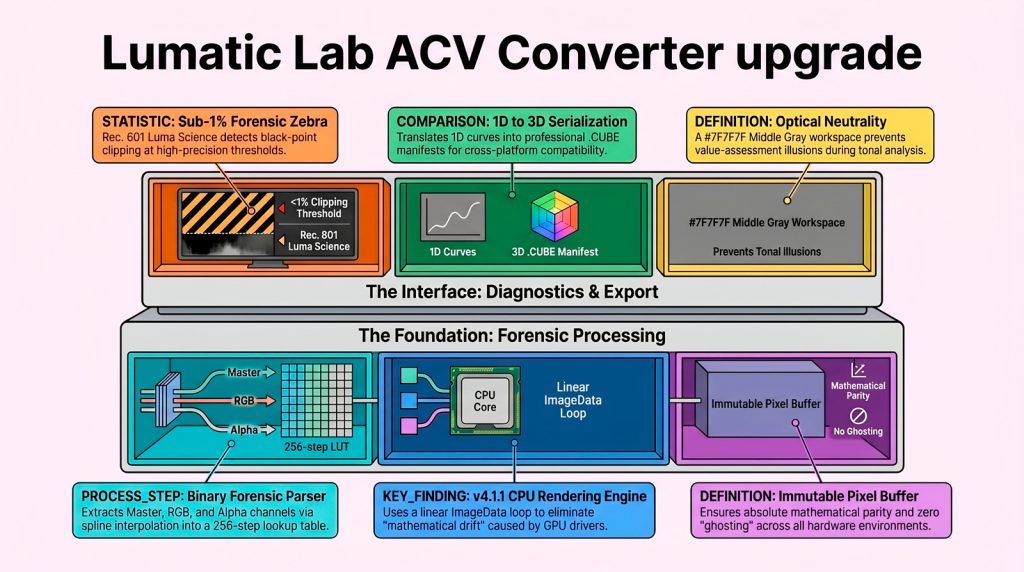
The converter reads the binary structure of ACV files, reconstructs channel curves, and applies them to images using a controlled CPU-based pipeline. This approach prioritises accuracy and transparency over speed gains from hardware acceleration. The result is a direct conversion of curve data into LUTs that can be used across most modern editing and grading software.
Users can load an image, apply one or more ACV curves, make a simple exposure adjustment, and export a set of outputs in one step. These include a full-resolution image, resized previews, and a 33×33×33 LUT file suitable for production use. Batch processing of multiple curves is also supported.
The ACV Converter is available as a stand-alone HTML application and runs in any modern Chromium-based browser.
The tool follows a “zero-footprint” model: no installation, no logins, and no data leaving the user’s device. All processing takes place in local memory, which may appeal to organisations with privacy or security requirements.
I. Quick Start Guide
To achieve a “Lab Final” export in under 60 seconds, follow these steps:
- Open this stand-alone HTML file in any modern Chromium-based browser
- Load Source Image: Drag a high-resolution image (JPG/PNG) anywhere into the central workspace or click “Load Image” in the left sidebar.
- Populate Curve Stack: Drag one or multiple .ACV files into the sidebar or click “Add .ACV Files.” The names will appear in the Curve Stack list.
- Audition Curves: Click any name in the Curve Stack to apply that curve to the image.
- Calibrate: Use the Exposure slider in the right sidebar to fine-tune the intensity.
- Identity: Enter a name in the “NAME” field (Asset Identity).
- Export: Click “Execute Quad Export” to download your laboratory bundle.
Here for Full User Manual / Quick Start Guide / Tech Details