This ON1 video tutorial demonstrates a step-by-step workflow to enhance an overexposed image using ON1 Photo RAW 2026.4.
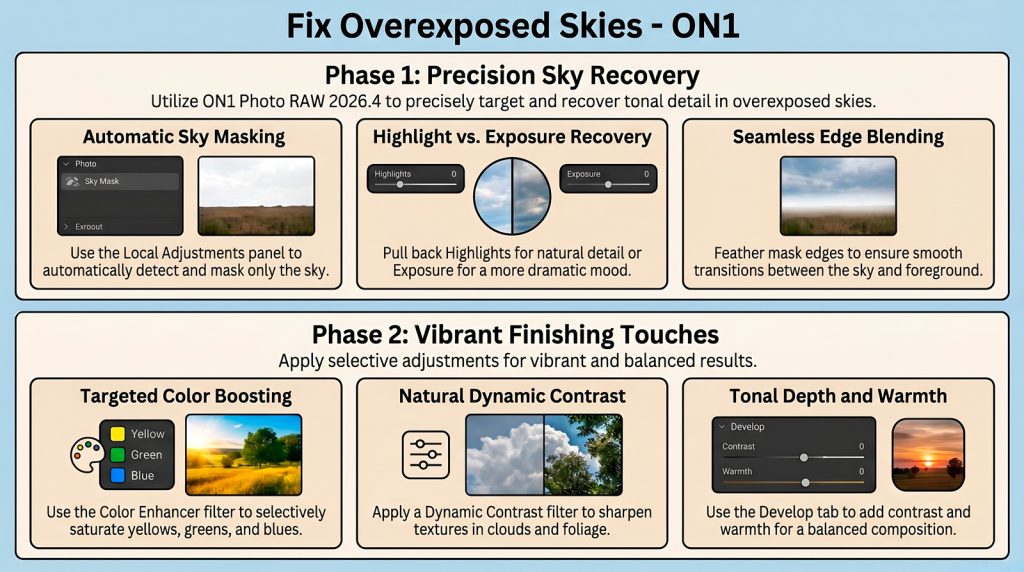
It introduces the new home module features, specifically focusing on how users can access dedicated practice files to follow along with the lesson. The workflow prioritises precision sky masking and local adjustments to recover lost tonal detail before moving to global enhancements. Key techniques include selective color boosting and the application of dynamic contrast filters to improve texture and vibrancy.
The tutorial exemplifies an efficient, systematic, editing workflow in ON1 Photo RAW 2026.4, combining new features and classic editing techniques to achieve stunning photo results by transforming flat, bright images into balanced and dramatic compositions.
This resource serves as both a software update overview and a practical guide for mastering digital post-processing tools.
Top 3 Impactful Takeaways
- Prioritize Sky over Foundations. Use Local Adjustments to create a Sky Mask before global edits. Apply Mask Refinement to feather edges for seamless, natural tonal integration.
- The “J-Key” Precision Hack. Toggle the J-key to monitor luminance clipping thresholds. This mathematical approach neutralizes blown-out data while ensuring no recoverable detail is lost.
- Luminance Balance. When compressing highlights, increase the Whites slider. This restores vital texture and prevents the image from appearing flat or dull.
Key Updates in ON1 Photo RAW 2026.4
- All-New Home Module: A centralized hub for efficient asset management and workflow initiation.
- Dedicated Practice Files Tab: Instant access to lesson-specific images at the bottom of the home screen.
- Automatic Sky Masking: Superior AI precision for building masks around complex horizons in 2026.4.
Reflection
These tools turn mere correction into dramatic art. As noted: “It’s doing a great job of bringing back the detail within that sky section there.” Finalize with Dynamic Contrast for professional textural depth.