
In many photo editing advice pages it is common to see such statements as :
- RAW files save all the raw data from your camera’s sensor. This gives you the power to fix bright highlights, open dark shadows, and change white balance without losing image quality.
- Because RAW files act like digital negatives, they look flat initially but let you recover shadow/highlight details, fix white balance, and adjust colours without ruining image quality – UNTRUE on so many levels.
Key Differences Between Film Negatives and RAW
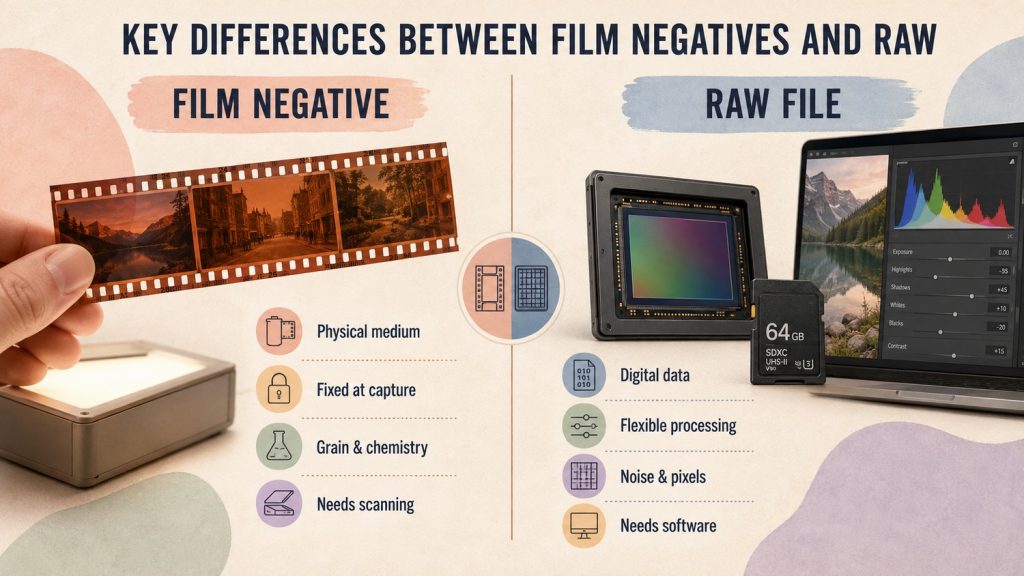
- Inversion vs. Data: Film negatives physically invert light and color (blacks are white, blues are orange), requiring a secondary optical or chemical step to make sense. RAW files are right-side-up, linear measurements of light data straight from the sensor.
- Reversibility and Alteration: Developing physical film permanently and irreversibly changes the silver halides in the emulsion. Processing a RAW file in software like Lightroom is completely non-destructive; the underlying data never changes no matter how many times you re-edit it.
- Standardization vs. Proprietary Formats: Any standard chemical process (like C-41) can develop a color film negative. RAW files are bound to proprietary vendor math (.NEF, .CR2, .ARW) that require specific software updates from companies just to decode the pixels.
| KEY TAKEAWAY RAW gives you more room to correct and interpret a photograph, but it does not replace accurate exposure, focus, colour management or reliable backups. |
RAW is flexible—not foolproof
A RAW file contains minimally processed sensor data rather than a finished picture. That extra information gives the editor greater control over white balance, tone, noise reduction, sharpening and colour. It is especially useful in difficult light, high-contrast scenes and photographs intended for careful printing.
The danger is that flexibility can be mistaken for immunity. RAW cannot restore fully clipped highlights, repair missed focus, choose a better shutter speed or protect a catalogue from drive failure. The best workflow treats RAW as a strong starting point – not as permission to be careless.
A dependable RAW workflow
- Capture the best exposure, focus and composition possible.
- Back up the files before major culling or editing.
- Choose the appropriate camera and lens profiles.
- Set white balance and overall exposure.
- Establish black and white points while checking RGB channels.
- Balance contrast and colour without forcing full recovery.
- Apply noise reduction and capture sharpening at 100% view.
- Use local masks only where they support the subject.
- Review the whole image at its intended output size.
- Export with the correct dimensions, colour space and output sharpening.
- Retain the RAW original, edit instructions and important finished masters.
KEY TAKEAWAY RAW gives you more room to correct and interpret a photograph, but it does not replace accurate exposure, focus, colour management or reliable backups.
RAW, JPEG or both?
RAW is the stronger choice for difficult light, unique photographs, major adjustments and high-quality printing. JPEG is sensible when speed, storage, immediate delivery or a reliable in-camera look matters more than extensive editing.
RAW+JPEG supplies both, but increases storage and duplicate-management work.
THE PRACTICAL RULE Shoot RAW when its flexibility has value, but expose and compose as though recovery were unavailable.
Final thought
Good RAW editing is less about moving every slider and more about protecting the quality of the captured information. Start with a technically sound file, make each adjustment for a clear reason, and judge the finished photograph – not the apparent power of the software.
Downloads
20_RAW_Editing_Mistakes (jpg)
20_RAW_Mistakes (pdf)